


How to Build a Wood Pallet Shed from Scratch: A Simple DIY Guide
Dreaming of extra storage space without breaking the bank? Building a shed from reclaimed wood pallets offers a fantastically affordable and eco-friendly solution. This guide walks you through the process, transforming discarded pallets into a sturdy and functional outdoor storage unit. Get ready to unleash your inner builder and reclaim some valuable space!
Planning Your Pallet Shed
Before you dive into demolition and construction, careful planning is crucial. Start by determining the desired dimensions of your shed. Consider the available space in your yard and the amount of storage you need. Sketch a simple plan, noting the placement of the door, windows (if desired), and any internal shelving. This visual blueprint will guide your construction process and help you estimate the number of pallets you'll need. Remember to check local building codes and regulations before starting your project; you might need permits depending on the size and location of your shed.
Gathering Your Materials
Source your pallets responsibly. Inspect them carefully for rot, damage, and any embedded nails or staples. You'll need a substantial number, depending on your shed's size. In addition to pallets, gather these essential materials:
- Heavy-duty screws: Opt for exterior-grade screws to ensure longevity.
- Power drill with various drill bits: This will significantly speed up the assembly process.
- Measuring tape and level: Accuracy is key for a stable structure.
- Hammer and crowbar (optional): To dismantle stubborn pallets and remove any protruding nails.
- Safety glasses and work gloves: Protecting yourself from splinters and flying debris is paramount.
- Wood sealant or paint (optional): To weatherproof and enhance the aesthetic appeal of your shed.
- Hinges and door latch: For a secure and functional door.
Constructing the Shed Frame
Begin by dismantling the chosen pallets. Carefully remove any loose nails or staples, prioritizing safety. Once you have individual boards, start constructing the shed's frame. Use your plan as a guide, creating a rectangular base from the sturdier pallet boards. Ensure the corners are square and secure them firmly using screws. Next, erect the walls, attaching the vertical boards to the base, creating a robust and stable structure. Remember to regularly check your work with a level to maintain perfect alignment. This step forms the foundation of your storage solution â€" a solid, stable frame is essential for a lasting shed.
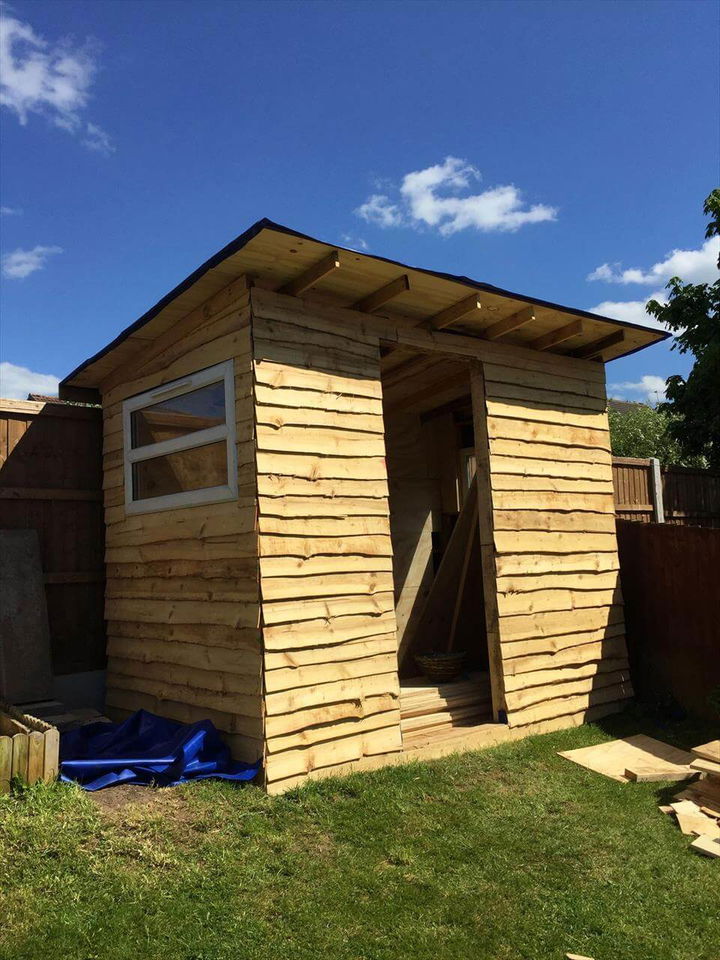
Adding the Roof and Door
Once the frame is complete, construct the roof. You can opt for a simple gable roof, using more pallet boards to create a sloped structure that sheds water effectively. Secure the roof firmly to the walls using screws. Finally, install your door using appropriate hinges and a secure latch. For enhanced durability, consider reinforcing the door frame with extra support beams.
Finishing Touches
After building the basic structure, personalize your pallet shed. You can add shelving inside using leftover pallet boards. Apply a wood sealant or paint to protect the wood from the elements and enhance its appearance. Consider adding a small window for ventilation and natural light. Take your time and appreciate the rewarding process of transforming reclaimed materials into a functional and attractive addition to your property.
Building a pallet shed is a rewarding DIY project that allows you to create valuable storage space while practicing eco-conscious construction. With careful planning and attention to detail, you’ll enjoy a unique and durable storage solution for years to come. Happy building!


No comments:
Post a Comment
Note: Only a member of this blog may post a comment.