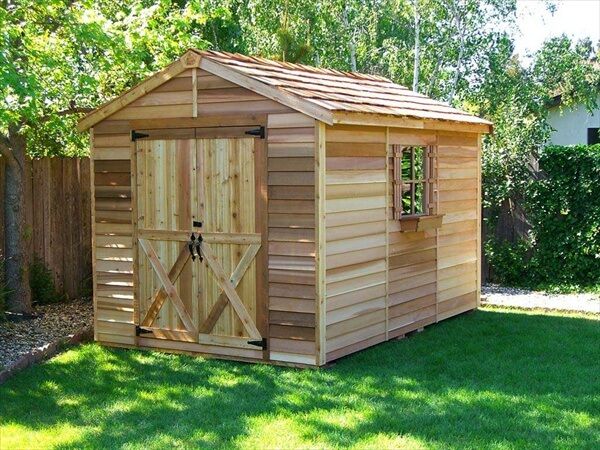
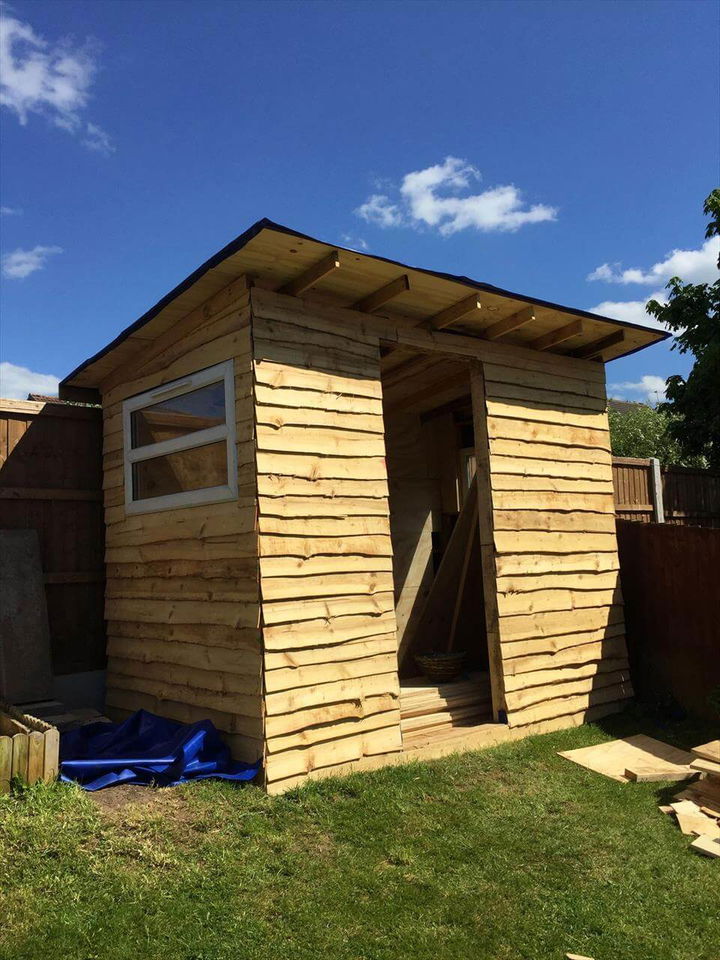
Learn how to create a simple DIY shed with easy-to-follow plans and blueprints.

Step-by-Step Lean-To Shed DIY: Build a Shed with Minimal Cost

Step-by-Step Lean-To Shed DIY: Build a Shed with Minimal Cost

Build Your Dream Lean-To Shed on a Budget: A Step-by-Step DIY Guide

Dreaming of extra storage space but dreading the hefty price tag of a pre-built shed? Don't despair! A lean-to shed offers a practical and surprisingly affordable solution. This guide walks you through building your own lean-to shed, minimizing costs and maximizing your DIY skills. Get ready to transform unused space into a valuable asset!

Planning Your Lean-To Shed: Laying the Foundation for Success

Before you grab your tools, careful planning is crucial. First, choose the perfect location. Consider proximity to your house or existing structure (for support), sun exposure, and access for ease of use. Next, determine the shed's dimensions. Keep it manageable for your skill level and budget â€" a smaller shed requires less material and time. Sketch out a simple design, noting the desired length, width, and height. Finally, check local building codes. This ensures your shed complies with regulations and avoids potential issues later.

Essential Materials: Gathering Your Arsenal

This project prioritizes affordability. Source materials strategically: consider reclaimed lumber, discounted supplies from local lumberyards, or even repurposing materials you already own. You’ll need:

  • Pressure-treated lumber for the base and framing (consider 4x4 posts for the foundation and 2x4s for the framing).
  • Plywood or OSB (Oriented Strand Board) for the walls and roof.
  • Roofing materials (tar paper, shingles, or metal roofing â€" choose the most budget-friendly option).
  • Nails, screws, and a level.
  • Optional: Hardware cloth for ventilation (to deter rodents and insects).

Remember to factor in extra material for potential cuts and mistakes. A well-stocked tool kit is equally crucial. A circular saw, hammer, measuring tape, and a spirit level will be your best friends throughout this project.

Construction: Building Your Lean-To Step-by-Step

Creating the Foundation: A Solid Base

Start by preparing the ground. Level the area and create a foundation using concrete footings or pressure-treated 4x4 posts set in concrete. This foundation will provide stability and prevent rot. Ensure the posts are perfectly plumb and spaced according to your design. Attach a sturdy base frame using pressure-treated lumber, creating a strong base for your lean-to structure.

Framing the Walls and Roof: The Skeletal Structure

Now, erect the framing for the walls and roof. Use 2x4s to create the wall studs and roof rafters, ensuring proper spacing and alignment. Remember to account for the roof's slope; a gentle slope is ideal for water runoff and minimizes material costs. Securely fasten all framing members using nails or screws. The lean-to’s simplicity allows for a straightforward wall and roof framing process â€" even beginners can easily handle it.

Sheathing and Roofing: Weather Protection

Attach the plywood or OSB sheathing to the wall framing. This provides a solid surface for the exterior cladding and adds structural rigidity. Next, lay down roofing felt or tar paper over the roof rafters, creating a waterproof barrier. Finally, install your chosen roofing material â€" shingles are a cost-effective choice, but metal roofing offers longer-lasting durability.

Finishing Touches: Adding the Final Details

Once the structure is complete, add finishing touches. Consider adding a simple door or windows if desired, keeping it simple and cost-effective. Apply a coat of exterior-grade paint or sealant to protect the wood from the elements and enhance its appearance. Remember to seal all joints and gaps to keep moisture out.

Congratulations! You've successfully built your own lean-to shed. Enjoy your new storage space and the satisfaction of a job well done! Remember that this is a basic guide. Customize it to your specific needs and enjoy the process of creating something useful and beautiful with your own two hands.

Share:

How to Make a Lean-To Shed DIY: A Quick and Practical Backyard Build

How to Make a Lean-To Shed DIY: A Quick and Practical Backyard Build

How to Make a Lean-To Shed DIY: A Quick and Practical Backyard Build

Dreaming of extra storage space without the hefty price tag of a pre-built shed? A lean-to shed is the perfect DIY project for the weekend warrior. This simple structure, leaning against an existing wall (like your house or garage), offers surprisingly ample storage with minimal effort and cost. This guide provides a step-by-step plan to build your own lean-to, transforming a cluttered corner into a functional and attractive addition to your backyard.

Planning Your Lean-To Shed

Before grabbing your tools, carefully plan your lean-to's dimensions and location. Consider the available space against your existing wall. Measure carefully to determine the length and width you need. A smaller structure is easier and cheaper to build, while a larger one will naturally require more materials and time. Sketch a basic plan, noting the dimensions and the position of the supporting posts. Check local building codes for permit requirements and setbacks from property lines. Remember to account for the roof overhang, which will extend beyond the base structure.

Choosing Your Materials

Select durable and weather-resistant materials. Pressure-treated lumber is an excellent choice for the frame, offering protection against rot and insect damage. For the roof, consider using plywood sheathed with asphalt shingles or metal roofing for a longer lifespan. You'll also need concrete or metal posts for supporting the structure, screws, nails, and a waterproof sealant. A level, measuring tape, saw (circular saw is recommended), and a drill are essential tools. Don't forget safety glasses and work gloves!

Building the Lean-To Frame

Start by digging holes for your support posts, ensuring they are set firmly in the ground. Use concrete to secure them, allowing ample time for the concrete to cure completely. Next, construct the frame by attaching the pressure-treated lumber to the posts. Ensure the frame is square and level, using a level and measuring tape frequently. This is crucial for the structural integrity of your shed. Carefully measure and cut all lumber to the correct dimensions before fastening it together. Consider pre-drilling holes to prevent the wood from splitting when screwing.

Roof Construction

Once the frame is complete, it’s time to build the roof. Attach plywood sheeting to the frame, creating a sloped surface to allow for water runoff. Ensure the plywood is securely fastened using appropriate nails or screws. Then, apply your chosen roofing material (asphalt shingles or metal roofing). Work carefully, ensuring proper overlap to prevent leaks. Seal all joints and seams to create a waterproof barrier.

Finishing Touches and Considerations

After the roof is finished, consider adding a door or simply leaving an opening for access. You can further enhance the lean-to by adding a simple shelf system for better organization. Painting or staining the wood will not only improve its aesthetics but also enhance its longevity, protecting it from the elements. Regular maintenance, including checking for loose screws and patching any cracks, will ensure your lean-to remains functional and attractive for years to come. Enjoy your new, cost-effective storage solution!

Optional Additions

Consider these extras to further customize your lean-to:

  • Adding a simple window for ventilation.
  • Installing a lockable door for security.
  • Building in additional shelving units.
  • Using decorative trim to enhance the appearance.
Share:

DIY Wood Pallet Shed: How to Use Recycled Materials for Your Backyard

DIY Wood Pallet Shed: How to Use Recycled Materials for Your Backyard

DIY Wood Pallet Shed: How to Use Recycled Materials for Your Backyard

Hey there, fellow DIY enthusiasts! Ever looked at those discarded wood pallets and thought, "There's gotta be something I can do with those"? Well, you're in luck! Today, we're diving headfirst into building a fantastic, functional, and eco-friendly shed using nothing but recycled wood pallets and a whole lot of creativity. Let's get started!

Planning Your Pallet Shed: Dreaming Big (but Realistically)

Before you grab your hammer and start nailing, some planning goes a long way. Seriously, don't skip this step! It'll save you headaches later on.

Size and Location:

First things first: how big do you want your shed? Consider what you'll be storing. A small shed for gardening tools is different from one to house lawnmowers and bikes. Also, think about your backyard space. Where will the shed fit best? Consider sunlight, proximity to power sources (if needed for lighting or tools), and drainage.

Pallet Selection and Assessment:

This is where the fun (and maybe a little grit) begins! You'll need to source your pallets. Check with local businesses â€" construction sites, breweries, and even grocery stores â€" often have pallets they're happy to get rid of. Important Note: Not all pallets are created equal. Look for pallets made of sturdy, treated lumber. Avoid pallets showing signs of significant damage, rot, or pest infestation. Think strong, stable, and reusable!

Tools and Materials (Beyond Pallets):

You won't just need pallets. Gather these essentials:

  • Hammer
  • Nails (various sizes, depending on your pallet wood thickness)
  • Screws (for extra strength, especially in critical areas)
  • Measuring tape
  • Level
  • Saw (circular saw or hand saw)
  • Safety glasses
  • Work gloves
  • Optional: Power drill/driver
  • Optional: Wood sealant or paint for protection against the elements
  • Optional: Roofing material (tar paper, corrugated metal, or even recycled shingles)

Remember, safety first! Always wear safety glasses and gloves when working with wood and tools.

Building Your Pallet Shed: Hands-On Construction

Now for the satisfying part â€" building your shed! This is a general guide; the exact process may vary slightly depending on your pallet dimensions and design.

Foundation:

Start with a solid foundation. This could be as simple as a compacted gravel base, a concrete slab (for extra durability), or even a wooden frame set on concrete blocks. The choice depends on your shed's size and weight.

Floor Construction:

Lay down your pallets to form the shed's floor. You might need to cut and adjust some pallets to fit perfectly. Secure them together using screws and nails, ensuring a level and stable base. Consider adding a layer of plywood on top for a smoother finish.

Wall Construction:

This is where the real creativity comes in! You'll likely be stacking pallets vertically to form the walls. Secure each pallet to the adjacent ones using screws or nails. Remember to check for squareness and levelness at each stage. You might need to cut pallets to accommodate door and window openings. Consider adding additional framing or bracing for extra stability.

Roof Construction:

The roof is often the most challenging part. You can opt for a simple gable roof or a more complex design depending on your skills and the shed's size. Ensure that the roof framing is strong enough to support the roofing material you've chosen. Then, attach your chosen roofing materialâ€"be it tar paper, corrugated metal, or even reclaimed roofing shinglesâ€"securing it tightly to prevent leaks.

Door and Window Installation:

Plan the placement of doors and windows carefully. You'll likely need to cut openings in the pallet walls and add framing to support the doors and windows. Use sturdy hinges and door handles for the doors. For windows, consider using recycled glass or plastic panels.

Finishing Touches: Making it Shine (and Last)

Once the structure is complete, it’s time for the finishing touches that will protect your investment and give your shed a personalized look.

Sealing and Painting (Optional):

To protect the wood from moisture and insects, applying a wood sealant or paint is highly recommended. Choose a weather-resistant sealant or exterior paint designed to withstand the elements. This will extend the life of your shed considerably.

Personalization:

This is your chance to add your own personal touch! You could add a coat of your favorite color, attach decorative trim, or even incorporate some upcycled materials to make your shed unique. Let your creativity run wild!

Commonly Asked Questions

Here are some common questions people ask about building a pallet shed:

Q: Are all pallets safe to use?

A: No. Only use pallets marked as "HT" (heat-treated) or "KD" (kiln-dried). These are treated for pest control without using harmful chemicals. Avoid pallets with markings indicating chemical treatment (e.g., "MB").

Q: How long will a pallet shed last?

A: With proper construction and sealing, a well-built pallet shed can last for several years. However, the lifespan depends on factors like weather conditions, the quality of the pallets, and the type of sealant used.

Q: Do I need a permit to build a shed?

A: This depends on your local building codes. Check with your local council or planning department before you start building. Sheds exceeding certain dimensions or requiring specific features often require permits.

Q: Can I use pallets that have been used to transport food?

A: While generally not recommended for structural elements, you can use these for less critical purposes, like fencing or less crucial parts of the structure if cleaned thoroughly.

Q: What kind of roofing material is best?

A: Corrugated metal is a popular and durable choice for pallet sheds. However, you can also use tar paper, recycled shingles, or even other weather-resistant materials.

Building a pallet shed is a rewarding project that lets you combine creativity, sustainability, and resourcefulness. Remember to plan carefully, prioritize safety, and enjoy the process! Happy building!

Share:

Create a Durable Wooden Pallet Shed with These Easy-to-Follow Plans

Create a Durable Wooden Pallet Shed with These Easy-to-Follow Plans

Build Your Own Durable Wooden Pallet Shed: A Step-by-Step Guide

Tired of clutter overflowing your garage or garden? A shed offers the perfect solution, but store-bought options can be expensive. This guide shows you how to construct a sturdy and attractive shed using reclaimed wooden pallets â€" a budget-friendly and eco-conscious alternative!

Planning Your Pallet Shed

Before you dive in, careful planning is key. Consider the size and location of your future shed. Measure the available space and determine the dimensions that best suit your needs and the surrounding environment. Think about the desired features: Will you need shelving? Ventilation? A door? Sketch a basic design to visualize the final product. Remember to check local building codes and regulations before beginning construction. You’ll need to source your pallets. Look for pallets that are sturdy, free of rot, and relatively clean. Inspect each pallet for damage before you start. A mix of different sizes might be unavoidable, so plan your design accordingly.

Choosing Your Pallets

Not all pallets are created equal. Prioritize pallets constructed from hardwood for increased durability. Inspect each pallet thoroughly for signs of rot, pest infestation, or significant damage. Clean the pallets with a wire brush to remove loose debris and dirt. This step improves the longevity and aesthetic appeal of your finished shed.

Materials and Tools

Gather the necessary materials and tools. Besides the pallets, you'll need construction-grade screws, a drill with appropriate bits, a level, a measuring tape, a saw (circular saw is recommended for easier cutting), safety glasses, work gloves, and possibly some additional lumber for reinforcement or specific features (like shelving or a door frame).

Essential Tool Checklist

  • Circular Saw
  • Drill with assorted drill bits
  • Measuring Tape
  • Level
  • Safety Glasses
  • Work Gloves
  • Hammer
  • Screwdriver (or impact driver)

Construction Steps

Begin by creating the foundation. You can use a concrete slab, compacted gravel, or even a sturdy wooden platform. Next, assemble the shed's walls using the pallets. Secure them together using screws, ensuring that the joints are tight and level. Pay attention to the orientation of the pallets â€" strategically placing the strongest parts to support weight. Build the roof frame, using additional lumber if necessary, to create a sturdy structure. Finally, cover the roof with plywood or other appropriate roofing material. Consider adding a simple door and windows to complete the build.

Building the Frame

Start with the base. Securely fasten pallets together to form the shed’s walls, ensuring vertical alignment using a level at every stage. Use longer screws for added stability and consider adding bracing to strengthen the corners. Build the frame, remembering that the roof structure must be able to support the weight of roofing materials. Add cross-beams for extra support.

Adding the Roof

Construct the roof frame using additional lumber to create a sturdy structure. Attach the chosen roofing material securely. Options include plywood sheeting covered with roofing felt or even repurposed corrugated metal sheeting for a more rustic look.

Finishing Touches

Once the structure is complete, consider adding a coat of weather-resistant sealant or paint to protect the wood and enhance the shed's appearance. This step extends the life of your shed and gives it a professional finish. You can customize the shed further by adding a door, windows, or even shelving inside. Enjoy your new, functional, and attractive pallet shed!

Disclaimer: Always prioritize safety when working with tools and building materials. Consult a professional if you're unsure about any aspect of the construction process.

Share:

How to Build a Wood Pallet Shed from Scratch: A Simple DIY Guide

How to Build a Wood Pallet Shed from Scratch: A Simple DIY Guide

How to Build a Wood Pallet Shed from Scratch: A Simple DIY Guide

Dreaming of extra storage space without breaking the bank? Building a shed from reclaimed wood pallets offers a fantastically affordable and eco-friendly solution. This guide walks you through the process, transforming discarded pallets into a sturdy and functional outdoor storage unit. Get ready to unleash your inner builder and reclaim some valuable space!

Planning Your Pallet Shed

Before you dive into demolition and construction, careful planning is crucial. Start by determining the desired dimensions of your shed. Consider the available space in your yard and the amount of storage you need. Sketch a simple plan, noting the placement of the door, windows (if desired), and any internal shelving. This visual blueprint will guide your construction process and help you estimate the number of pallets you'll need. Remember to check local building codes and regulations before starting your project; you might need permits depending on the size and location of your shed.

Gathering Your Materials

Source your pallets responsibly. Inspect them carefully for rot, damage, and any embedded nails or staples. You'll need a substantial number, depending on your shed's size. In addition to pallets, gather these essential materials:

  • Heavy-duty screws: Opt for exterior-grade screws to ensure longevity.
  • Power drill with various drill bits: This will significantly speed up the assembly process.
  • Measuring tape and level: Accuracy is key for a stable structure.
  • Hammer and crowbar (optional): To dismantle stubborn pallets and remove any protruding nails.
  • Safety glasses and work gloves: Protecting yourself from splinters and flying debris is paramount.
  • Wood sealant or paint (optional): To weatherproof and enhance the aesthetic appeal of your shed.
  • Hinges and door latch: For a secure and functional door.

Constructing the Shed Frame

Begin by dismantling the chosen pallets. Carefully remove any loose nails or staples, prioritizing safety. Once you have individual boards, start constructing the shed's frame. Use your plan as a guide, creating a rectangular base from the sturdier pallet boards. Ensure the corners are square and secure them firmly using screws. Next, erect the walls, attaching the vertical boards to the base, creating a robust and stable structure. Remember to regularly check your work with a level to maintain perfect alignment. This step forms the foundation of your storage solution â€" a solid, stable frame is essential for a lasting shed.

Adding the Roof and Door

Once the frame is complete, construct the roof. You can opt for a simple gable roof, using more pallet boards to create a sloped structure that sheds water effectively. Secure the roof firmly to the walls using screws. Finally, install your door using appropriate hinges and a secure latch. For enhanced durability, consider reinforcing the door frame with extra support beams.

Finishing Touches

After building the basic structure, personalize your pallet shed. You can add shelving inside using leftover pallet boards. Apply a wood sealant or paint to protect the wood from the elements and enhance its appearance. Consider adding a small window for ventilation and natural light. Take your time and appreciate the rewarding process of transforming reclaimed materials into a functional and attractive addition to your property.

Building a pallet shed is a rewarding DIY project that allows you to create valuable storage space while practicing eco-conscious construction. With careful planning and attention to detail, you’ll enjoy a unique and durable storage solution for years to come. Happy building!

Share:

How to Build a Lean-To Shed DIY for Your Garden Tools and More

How to Build a Lean-To Shed DIY for Your Garden Tools and More

Building Your Own Lean-To Shed: A DIY Garden Project

Hey there, fellow gardening enthusiasts! So, you're thinking about building a lean-to shed? Awesome! It’s a fantastic project that can seriously upgrade your garden game. Forget about constantly tripping over your trowels and battling the elements with your precious plants â€" a lean-to shed offers a perfect, simple solution for storing tools, supplies, and even a few potted plants. And the best part? You can totally DIY it! This guide will walk you through the entire process, from planning to the final celebratory cup of tea (or lemonade!).

Planning Your Lean-To Shed: Dreams vs. Reality

Before you even think about touching a saw, let's get the planning stage nailed down. This is crucial to avoid headaches (and potential costly mistakes) later on.

Size and Location, Location, Location!

First things first: how big do you need your shed to be? Think about what you want to store. A small lean-to might be perfect for just tools and potting soil, while a larger one might accommodate bikes, lawnmowers, and even a potting bench. Once you have a size in mind (and maybe even a rough sketch!), consider the location. You'll want it close enough to your garden for easy access but also in a spot that won't impede walkways or create a tripping hazard.

Also, think about sunlight and drainage. A slightly shady spot is ideal to prevent tools from overheating, and good drainage will prevent waterlogging, which could rot the base of your shed. Check local building codes and regulations â€" you might need permits, depending on the size of your lean-to.

Materials: Choosing the Right Stuff

Now for the fun part â€" picking your materials! This will largely depend on your budget and aesthetic preferences. Here's a breakdown of common choices:

  • Framing: Pressure-treated lumber (to withstand the elements) is a standard choice. You’ll need posts for the base, framing for the walls, and rafters for the roof.
  • Roofing: Asphalt shingles are affordable and durable. You could also consider corrugated metal roofing for a more modern look (and it's super strong!). Remember to choose roofing that suits your local climate.
  • Siding: There are tons of options, from inexpensive plywood (that you'll need to paint or stain for protection) to more stylish options like cedar or composite boards.
  • Base: A concrete slab provides a solid, level foundation, but it can be more expensive and requires some concrete work. Alternatively, you can use pressure-treated lumber for a simpler, less permanent base. This is a perfectly acceptable choice for many lean-tos.

Building Your Lean-To: Let's Get Our Hands Dirty!

Right, let's get constructing! Remember to always prioritize safety â€" wear safety glasses, gloves, and sturdy work boots.

Building the Base

Start with a level base. If you're using a concrete slab, make sure it's properly poured and cured before proceeding. If you're using pressure-treated lumber, create a frame using 4x4 posts, ensuring they're level and securely anchored into the ground. You can use concrete footings for extra stability.

Framing the Walls and Roof

Once the base is ready, you can start framing the walls. Cut and assemble your wall studs according to your measurements. Remember to add bracing for extra strength. The roof is typically a simple A-frame or a single slope. Cut your rafters to the correct length and angle, making sure they're securely fastened to the wall studs and to each other at the peak.

Adding Roofing and Siding

Once the framing is complete, you can install your roofing material. Follow the manufacturer's instructions for proper installation. Remember to allow for proper overhang to protect the walls from rain. After the roof, it's time for the siding. Attach your chosen siding material to the wall framing, ensuring it's securely fastened and weathertight.

Adding Finishing Touches

Congratulations! You've built the structure! But let's make it really shine. Consider adding a door, windows (for ventilation and light), and shelving inside. You might also want to paint or stain the exterior for extra protection and a nice aesthetic. A little bit of landscaping around the base can also really finish it off!

Essential Tools for Your Lean-To Shed Project

Before you start, gather these essential tools:

  • Measuring tape
  • Level
  • Saw (circular saw or hand saw)
  • Drill and drill bits
  • Hammer
  • Screwdriver
  • Shovel (if digging post holes)
  • Safety glasses
  • Work gloves
  • Post hole digger (if using)
  • Concrete mixer (if using a concrete base)

This list isn't exhaustive, and you may need additional tools depending on the materials you choose.

Commonly Asked Questions

Q: How long does it take to build a lean-to shed?

A: The time it takes depends on the size and complexity of your shed, as well as your experience with DIY projects. A small, simple lean-to could be built in a weekend, while a larger or more complex one might take several weekends.

Q: How much does it cost to build a lean-to shed?

A: Costs vary significantly depending on the size, materials, and complexity of your shed. You can build a basic lean-to for a few hundred dollars, but more elaborate designs can cost several thousand.

Q: Do I need a building permit?

A: This depends on your local building codes and regulations. Check with your local council or building department before starting your project. The size and type of construction also play a role.

Q: What if I’m not very handy?

A: Don't worry! There are tons of online resources, videos, and even classes that can help you learn the skills you need. You can also enlist the help of a friend or family member who's more experienced with DIY projects.

Q: Can I build a lean-to shed against an existing structure?

A: Yes, you can, but be mindful of local building codes and make sure the existing structure is strong enough to support the added weight of the lean-to. You may need to consult a structural engineer if you're unsure.

There you have it! Building a lean-to shed is a rewarding project that can greatly improve your garden. Don't be afraid to get started â€" with a little planning and effort, you'll have a fantastic new storage space in no time. Happy building!

Share:

Build a 10x12 Pallet Shed with Recycled Materials: Simple Plans

Build a 10x12 Pallet Shed with Recycled Materials: Simple Plans

Build Your Own 10x12 Pallet Shed: A Guide to Recycled Resourcefulness

Tired of clutter piling up? Dreaming of extra storage space without breaking the bank? This guide shows you how to construct a sturdy and surprisingly attractive 10x12 pallet shed using recycled materials. We’ll walk you through each step, transforming discarded pallets into a functional and eco-friendly addition to your property. Get ready to embrace your inner builder and unlock the potential of repurposed resources!

Gathering Your Materials: The Foundation of Your Project

Before you even pick up a hammer, meticulously source your materials. This project relies heavily on reclaimed pallets, so start your search early! Inspect each pallet carefully. Look for those that are free from rot, significant damage, and harmful chemicals. The sturdier the pallets, the more stable your shed will be. You'll need approximately 50-60 pallets depending on the desired wall height and desired pallet spacing. Beyond pallets, you'll need:

  • Foundation Materials: Concrete blocks or treated lumber for a level base. Consider the ground conditions â€" a concrete slab offers the most stability but requires more effort.
  • Roofing: Corrugated metal sheeting is a durable and cost-effective option, readily available at salvage yards or recycling centers. Alternatively, you can reuse old shingles or even repurpose large tarps.
  • Fasteners: Plenty of heavy-duty screws, nails, and possibly metal straps or brackets for added support. Galvanized options will resist rust.
  • Door Hardware: A sturdy door frame (which can also be crafted from pallets) and the necessary hinges and latch/lock.
  • Tools: Hammer, saw (circular saw is recommended), drill, level, measuring tape, safety glasses, work gloves.

Constructing the Foundation: A Solid Start

Building a stable foundation is crucial for a long-lasting shed. Start by clearing and leveling the ground. For a simple and effective foundation, use pressure-treated lumber as a base frame, creating a rectangle matching the dimensions of your shed (10ft x 12ft). Securely fasten the lumber together. Alternatively, use concrete blocks arranged in two rows to form a base. Ensure the blocks are level using a spirit level, adjusting as needed to create a perfectly flat and even surface.

Securing the Base

Once your chosen foundation is level, anchor it to the ground if needed. If you're using lumber, consider driving stakes into the ground and attaching them to the base frame. For concrete blocks, you might want to spread a thin layer of concrete to firmly fix the blocks in place and create a solid base for the pallets. This step is vital for resisting wind and shifting soil.

Building the Walls: Stacking Pallets with Precision

Now comes the rewarding part: assembling the walls using your carefully selected pallets. Start by cleaning the pallets thoroughly to remove dirt, debris, and any loose nails or splinters. Arrange the pallets vertically, creating sections for each wall. Experiment with different arrangements; you can create interesting patterns and textures by interspersing pallets with varying degrees of wear and tear. Use strong screws and potentially metal brackets to connect the pallets securely, ensuring a strong and stable wall.

Creating Wall Openings

Before completely fastening the walls, remember to cut openings for doors and windows. Plan your door placement carefully; the door frame should be strong and sturdy. You can create a simple frame from more pallets, reinforcing it with additional lumber for extra strength. You can repurpose old window frames for added aesthetics and functionality, or create simple openings and cover them with strong netting or salvaged glass.

Completing the Roof: Shielding Your Shed from the Elements

Constructing the roof is the final major step in building your pallet shed. Use additional pallets to create a sturdy framework for the roof. The roof needs to be slightly sloped to allow for water runoff. Secure the corrugated metal sheeting to this framework using appropriate fasteners. If using alternative roofing materials, ensure proper overlap for weatherproofing.

Finishing Touches: Adding the Finishing Touches

Once the roof is on, apply a sealant or weatherproofing agent to all exposed wood surfaces to enhance the lifespan and durability of the structure. Apply a coat of weatherproof paint if you wish to add an aesthetic touch to match your property or add insulation for winter conditions. Install the door using the pre-installed door frame and hardware. Finally, add any desired features like shelves or internal partitions using additional salvaged materials. And there you have it â€" your very own 10x12 pallet shed, built with recycled materials and brimming with sustainable charm!

Share:

Followers

Search This Blog

Powered by Blogger.

Blog Archive

Recent Posts

Theme Support